My tree service arrived and when they were through, I had a cleaned up yard and a large mound of wood chips. The weather has been cold so the ground is quite frozen--a good time to add the wood chip mulch in my summer perennial border. I just need to find some time to do it. It's getting a bit crazy with the holiday season upon us. I still have to put up my outdoor Christmas lights, also.
My Bluestone Perennials catalog arrived so I have had some nice reading by the fire on these cold nights--ah spring ...
Nothing else to report.
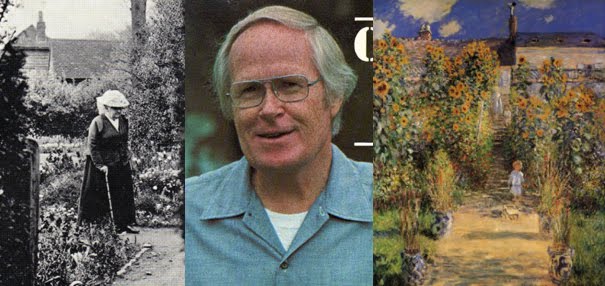
Down the garden path ...

...and strolling through a garden of memories
~Gertrude Jekyll, Jim Crockett, Grandmother, & I~
Friday, December 10, 2010
Sunday, December 5, 2010
Weather cold, but not bad
Well, we "only" had an inch of rain, so my plants got watered in but not drowned. The soil has frozen somewhat. My tree service still has not come so my husband and I gathered leaf mold, pine and spruce needles, and leaves from our woods and used that to protect the newly planted plants. If my tree service doesn't come this week and leave my wood chips, we will just gather more detritus from our woods (we have lots of woods) and cover the entire summer perennial border with them.
It's good to have one's own free supply of garden cover--at least we have options.
It's good to have one's own free supply of garden cover--at least we have options.
Tuesday, November 30, 2010
Another deluge on the radar map!
The Amazon Basin is having a drought and we get soaked ... what weather patterns!
The Wayside plants came well-watered and since I was expected (but not wanting) any downpours, I did not water my new plants after I planted them yesterday. I will go out shortly and make sure they look good -- we did not have frost last night, so, so far, they should be ok. I was hoping my tree service would have come by now to take down some more trees, do some cleanup, and leave me a big pile of woodchips to use on my perennial garden, but so far, he has not come. Let's see ... I did say that gardening teaches us that "patience is a virtue"!
Well, I can always cut some spruce branches and gather some decomposing leaves and put them on my plants.
Monday, November 29, 2010
Wayside plants arrived--thank the maker!
My Wayside plants arrived this afternoon:
Spodiopogon sibiricus
 Phlox 'David's Lavender'
 Penstemon 'Dark Towers'
 Leucanthemum superbum
 Hydrangea 'Lady in Red' (a lacecap)
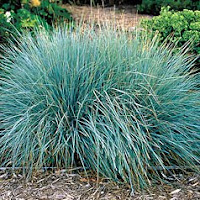
 Helictotrichon (Blue Oat grass)
 Clematis 'Jackmanii'
 Baptisia 'Solar Flare'
 Baptisia 'Purple Smoke'
  Aruncus aethusifolius (a dwarf goatsbeard)
 and a beautiful orange Iris whose name I can't remember for the mo'.
Since both my husband and I were home, we rushed out, uncovered our unfrozen purchased topsoil and peat moss,removed the plants from the box, and planted like madmen, replacing frozen, unappealing in-ground soil with a better mix. The plants were packed well and all were there. They seem in reasonable condition considering the time of year! Wayside assured me in a conversation and by email, that I have until June of next year to let them know if any do not come to life in the spring and that I would get a refund. Obviously, that is reassuring, but I just want the plants to live long and prosper!
I have heard back from Lazy S'S Farm http://www.lazyssfarm.com/index.html) as to whether they sell blooming size perennials:
"Yes, everything is old enough to bloom for the most part. A few plants will not bloom until they are 4-5 years old and they are indicated in the plant descriptions."
I have already made up a wish list and I am seriouly considering the "16 plant special" (20% off ).
Also, I am still reading everybody's "small print" and the reviews on Dave's Garden. I don't know if all this research is making me happier about buying online or learier (is there such a word?).
Stay tuned ...
Spodiopogon sibiricus
Phlox 'David's Lavender'
 Penstemon 'Dark Towers'
 Leucanthemum superbum
 Hydrangea 'Lady in Red' (a lacecap)
 Helictotrichon (Blue Oat grass)
 Clematis 'Jackmanii'
 Baptisia 'Solar Flare'
 Baptisia 'Purple Smoke'
  Aruncus aethusifolius (a dwarf goatsbeard)
 and a beautiful orange Iris whose name I can't remember for the mo'.
Since both my husband and I were home, we rushed out, uncovered our unfrozen purchased topsoil and peat moss,removed the plants from the box, and planted like madmen, replacing frozen, unappealing in-ground soil with a better mix. The plants were packed well and all were there. They seem in reasonable condition considering the time of year! Wayside assured me in a conversation and by email, that I have until June of next year to let them know if any do not come to life in the spring and that I would get a refund. Obviously, that is reassuring, but I just want the plants to live long and prosper!
I have heard back from Lazy S'S Farm http://www.lazyssfarm.com/index.html) as to whether they sell blooming size perennials:
"Yes, everything is old enough to bloom for the most part. A few plants will not bloom until they are 4-5 years old and they are indicated in the plant descriptions."
I have already made up a wish list and I am seriouly considering the "16 plant special" (20% off ).
Also, I am still reading everybody's "small print" and the reviews on Dave's Garden. I don't know if all this research is making me happier about buying online or learier (is there such a word?).
Stay tuned ...
Friday, November 26, 2010
Dave's Garden & other mutterings
Dave's Garden is a terrific site including a section whereby gardeners rate nurseries they have used: http://davesgarden.com/
I have been researching ordering plants online and for the mo' anyway, I have a queasy feeling about it. After reading the reviews on "Dave" and VERY carefully reading the policy statements on the websites, and because I like to read between the lines, the list of vendors I am considering is getting shorter.
Perennials (http://bluestoneperennials.com/) still on my list. I started to order from them when they were just starting (or close to it). I was always happy with their service and their plants--AND -- you can specify the date of delivery! They sell seedlings and mature perennial seedlings as well as other plants. They have a printed catalog, which means you can read in the bath --at least I do. I also found that many of the perennial seedlings will bloom the first year, albeit as a baby, but bloom anyway! They offer a LOT of plants!
I have also ordered for many years from Gilbert H. Wild (http://www.gilberthwild.com/), --mostly daylilies and some irises. I have always been happy with their stock and have never received a sickly plant. They offer a wide variety of plants. Their prices are very good, especially if you shop the "sales/specials". Thus they are still on my list. They also have a printed catalog.
Lazy S'S Farm (http://www.lazyssfarm.com/index.html) is the next vendor for whom I have high hopes (very good reviews on Dave) but so far I am a bit confused after reading and trying to understand their policy statement. I think I would never want them (or any vendor) to automatically "backorder" any plant. If a vendor doesn't give an option, I will be leary of ordering. They do charge a handling as well as, shipping charge. They do have an interesting "buying" option: buy 16 (or multiples of 16) plants in your order and you get a 20% discount! The shipping and handling charge from Virginia to Connecticut is ~$30. They do not have a printed catalog. They do have a very large variety of plants, some of which are the "hard to come by" types. It would probably break my heart if I heard something untoward about them. I just emailed them a question as to whether their perennials can be expected to bloom the year I plant them. Ordering is not inexpensive, so I would like to see a bloom.
I have to admit that I do have the option of not ordering through the mail since there are many nurseries in my area and I don't even mind a nice drive in the "country" to find a good plant. This gives me option if being very particular about plant prices, handling charges, shipping charges, and any other policies.
Tuesday, November 23, 2010
Let the buyer beware
Actually this is just a rant at myself because I got carried away by the pretty plants and forgot to remember, and maybe this will give someone else something to consider before ordering this late in the season, at least here in New England -- or maybe you all are more relaxed about it than I am! (I worry at lot.)
Wayside kept sending me all sorts of good sales on "end-of-season" perennials emails and I decided to order. I have never ordered this late in the season and never will again, but it is too late for this order.
I know I am not the only buyer that Wayside has but I guess I assumed they would be shipping out late-season plants super fast. I ordered more than a week ago and I emailed them but when I got back an automated reply saying that it could be up to five (5!) business days before they got back to me, I called them to see if they had any idea when the order would be shipped. They were very pleasant (the order is "on the shipping floor", at least), but as to when it will ship, "maybe" today or tomorrow or in a couple of days. Anyway it will be December before the plants get here, hopefully the first week but maybe the second! I did also get an email reply. Both the live rep and the email were very pleasant, but the fact reminds that I should not have ordered this late.
As I said at the start, this is my fault -- I just got snookered by the pretty face of a plant.
I am also researching "shipping" costs and procedures for the couple of mailorder companies I am thinking of using in the spring. So far, I have some "disquieting" info, but more on that later.
Also, I found a great site: DavesGarden (I have to get the exact name) where buyers have put their "positive, negative, neutral" comments for sellers they have used ... quite interesting.
Saturday, November 20, 2010
Where is the right spot for this plant?
In preparation for the arrival of my plants from Wayside Gardens, I decided that I had better finish staking the allotted areas for the plants in general. Although I will probably deviate here and there as to the amount of space, and allow some “drifting” of plantings, I like to start with a framework. I also know that I will buy too many plants and then frantically look for an empty piece of earth -- but at least I know I had good intentions.
One of the “interesting” things with this year’s property renovation is that we have taken down a lot of trees; some new growth and some old. This will change the sun patterns for the property and I am no longer exactly sure of the sunny or shady patches in my new summer perennial border. I don’t think it will change much, but I could be in for a surprise! Well, since there are always some plants that have to move to a different home … now there may be a few extra.
Anyway, I have finished my layout and I have found places for the new plants. The weather is getting colder so I hope my plants arrive soon. I have never planted or transplanted this late in the year. It’s much nicer doing this work in the early fall. I thought that considering the lateness of the season, Wayside would be rushing the plants out, but I guess not. The site still says "not shipped yet".
Tuesday, November 16, 2010
Tis a puzzlement!
I must be a plantomaniac.
Oh my gosh, just when I closed down the great outdoors—I succumbed! Wayside Gardens has been sending me beautiful emails with all sorts of plants on sale. Each time I get one, I make a list. I then think it over and tell myself: “No, the season must wind down”… and I don’t order.
Alas, I weakened today. The perennials were just too beautiful, so I ordered some! Tonight I will sit around the fire and try to decide where to put them. I know I have to finish my perennial border layout and plant choice so maybe this will spur me on.
I used to order from Wayside many years ago and I was always happy with their stock. I hope they haven’t changed.
If I can’t find just the right spots, I will plant them in a temporary bed and wait for spring. Fortunately, I have a large unused vegetable garden that can be turned into a “nursery”.
Monday, November 15, 2010
Arm chair gardening
Although we have had some good weather for new plantings and transplanting old plants, I guess I became lazy and closed down until spring. I may do some things if my whimsy takes me … but nothing is a “must do” outside except to put stakes into the ground in the summer perennial border marking the individual planting areas within the border. I will be been busy thinking, though.
Must-do thinking:
1. *Which plants should be in the summer border – which are first choice and which are alternates?
2. What to do with the little garden off the kitchen porch?
3. How to work out the” two or three step and flower area” (for want of a better designation) from the lawn area down to behind the perennial border and into the property line shrub border?
4. How to nicely end the perennial bed at the house end?
5. Rework the straight edging where the roses are (and transplant the roses) and the straight edging of the little planting area outside the den window?
6. Since the linden tree (bless its heart) is growing tall and wide and makes marvelous shade, it is shading the little garden bed near it that used to be in the sun. What to put there instead, and where to transplant the climbing roses, privet, Siberian iris, and daylilies that are there now?
7. Since we have removed the “dwarf” Alberta spruce (they may grow slowly but they still grow tall!), we have space in the area for which other plants? Shall I also make the bed deeper?
On the back burner:
The perennial border (which had to be raised on its back edge) is backed by 2x10s with wooden stakes holding them in place. It would be nice to have something more elegant at some point … or maybe not.
My goodness, even thinking is tiring – I need a cup of tea!
Monday, November 1, 2010
Easy & delightful garden plan
I am forever cruising the net looking for landscaping ideas and I just found an absolutely delightful and easy growing full-sun perennial plan. It also helps that the site also included lovely photos of the planting--which include a couple of shrubs. The plants are easy to grow, and except for the sedum that must be "protected" from the d___ deer, maintenace should go smoothly. The border is 24 x 6 feet.
http://gardening.about.com/od/gardendesign/ig/Designing-a-Sunny-Border/
----------------------------------------------------------
The following is from the website: Full sun opens the doors to a full spectrum of plant material. The sunny border design illustrated here runs 24' long and is about 6' deep. It would look lovely against a fence or in front of a hedge. The colors here are minimal, mostly shades of purple and yellow. They can be intensified with stronger hued varieties are by adding more hot colored flowers, like orange daylilies or red phlox.
Most of the plants are suitable for a range of hardiness zones, but alternatives are listed. Specifics about each plant follow on successive pages.
1. Buddleia davidii 'Potters Purple'
2. Phlox paniculata 'The King'
3. Aster novae-angliae (New England Aster) 'Purple Dome'
4. Heliopsis helianthoides (Sunflower heliopsis, False Sunflower) 'Golden Plume'
5. Hemerocallis (Daylily) 'Hyperion'
6. Echinacea purpurea (Purple Coneflower) 'Vintage Wine'
7. Sedum 'Autumn Joy'
8. Achillea filipendulina 'Coronation Gold'
9. Perovskia (Russian Sage) 'Blue Spires'
10. Liatris spicata (Blazing Star) 'Kobold'
11. Coreopsis verticillata (Tickseed, Threadleaf Coreopsis) 'Moonbeam'
------------------------------------------------------
See the website for the alternatives. Also, there are many things of interest on this website. Give it a "look-see"! Hours of knowledge can be found here.
http://gardening.about.com/od/gardendesign/ig/Designing-a-Sunny-Border/
----------------------------------------------------------
The following is from the website:
Full sun opens the doors to a full spectrum of plant material. The sunny border design illustrated here runs 24' long and is about 6' deep. It would look lovely against a fence or in front of a hedge. The colors here are minimal, mostly shades of purple and yellow. They can be intensified with stronger hued varieties are by adding more hot colored flowers, like orange daylilies or red phlox.
Most of the plants are suitable for a range of hardiness zones, but alternatives are listed. Specifics about each plant follow on successive pages.
1. Buddleia davidii 'Potters Purple'
2. Phlox paniculata 'The King'
3. Aster novae-angliae (New England Aster) 'Purple Dome'
4. Heliopsis helianthoides (Sunflower heliopsis, False Sunflower) 'Golden Plume'
5. Hemerocallis (Daylily) 'Hyperion'
6. Echinacea purpurea (Purple Coneflower) 'Vintage Wine'
7. Sedum 'Autumn Joy'
8. Achillea filipendulina 'Coronation Gold'
9. Perovskia (Russian Sage) 'Blue Spires'
10. Liatris spicata (Blazing Star) 'Kobold'
11. Coreopsis verticillata (Tickseed, Threadleaf Coreopsis) 'Moonbeam'
------------------------------------------------------
See the website for the alternatives. Also, there are many things of interest on this website. Give it a "look-see"! Hours of knowledge can be found here.
Sunday, October 31, 2010
Red slabs in the sunset
The red slab edging is in place, at least for the major portion of the border. The border finally looks "real"!

I found a very small butterfly bush in the garden area, but I have no idea how it got there.

I don't remember planting one that spot in the previous border of many years ago. Anyway, I decided to transplant it to a better spot in the border and I was surprised to find out that it was three plants! I transplanted one but I am not sure that it liked the transplanting process. Well, if it doent't come up in the spring, I still have two more!
Thursday, October 28, 2010
Still buying, still planting
We went to Home Depot in Fairfield today to get some red slabs since the HD in Norwalk didn’t have any and was not getting any until next spring and I wanted to edge the summer border now. This we did and it looks very neat. Besides, now I can take away the string edging that I keep tripping over!
HD was having a great (50-75% off) end of season sale on plants and shrubs—so of course I had to buy some:
Echinacea purpurea Achillea 'Moonshine'
  Potentilla fruticosa ‘Pink Beauty”
 Agastache ‘Purple Haze’
I planted them in the border and gave them a spray of Miracle-Gro. The plants have some flowers on them and look very sprightly.
Since the day was so nice, I decided to transplant the Mock Orange (Philadelphus ‘Snowbelle’) and the Spirea (Spiraea japonica ‘Anthony Waterer’)
 from the porch garden to the summer border. They certainly weren’t happy by the porch, so I hope I have found better spots for them.
I am still in a quandary as to how to arrange the porch garden. It is not a big area, but I really don’t want it to just have the Korean lilac and the hydrangea--although now that I have untied the hydrangea it has taken over. I am also thinking of trying to do drastic pruning on the lilac after it blooms. If worse comes to worst, I will remove it and plant something else there and plant a new Korean lilac where it can sprawl to its heart content.
HD was having a great (50-75% off) end of season sale on plants and shrubs—so of course I had to buy some:
Echinacea purpurea
Achillea 'Moonshine' Potentilla fruticosa ‘Pink Beauty”
Agastache ‘Purple Haze’
I planted them in the border and gave them a spray of Miracle-Gro. The plants have some flowers on them and look very sprightly.
Since the day was so nice, I decided to transplant the Mock Orange (Philadelphus ‘Snowbelle’)
and the Spirea (Spiraea japonica ‘Anthony Waterer’)from the porch garden to the summer border. They certainly weren’t happy by the porch, so I hope I have found better spots for them.
I am still in a quandary as to how to arrange the porch garden. It is not a big area, but I really don’t want it to just have the Korean lilac and the hydrangea--although now that I have untied the hydrangea it has taken over. I am also thinking of trying to do drastic pruning on the lilac after it blooms. If worse comes to worst, I will remove it and plant something else there and plant a new Korean lilac where it can sprawl to its heart content.
Monday, October 25, 2010
Another nice day for gardening
I can not believe what a gorgeous day it is -- considering that we are threatened with thunderstorms later this evening.
I bought another three Hosta from Home Depot the other day. I was very impressed with the first plant I bought, and now the $5 plants are 25% off! I added them to the edging in the summer border with two of them behind, sort-of. I transplanted another yellow foxglove that was growing in the wrong spot to a better spot in the border. I also transplanted a number of ajuga (I seem to be being taken over by periwinkle, ajuga, and Lamb's Ears--but it's ok since I like them) to the border. I also found a lonely physostegia growing elsewhere so I put it in the border also.
I found a young autumn olive growing in my woods so I moved it to near the gazebo.
I gave all the just-planted a good dosing of Miracle-Gro with my sprayer and decided to call it a day. I will rest on my laurels. I am a staunch believer in spraying plants with Miracle-Gro. My plants love it.
Sunday, October 24, 2010
Shrub border to block view
I was at a loss what to do to block the view into my neighbor's woods from my summer perennial border. There is a rock wall but it is low and rather rough and tumble. 
 I got some good ideas from a "gardening coach". Her name is Debbie Roberts and I found her through the Garden Designers' Roundtable web site. She lives in my area so she is very knowledgeable with the problems and good points of this spot and knowledgeable of gardening in general.
The space between the back of the border is only about 12 feet from the property line at its closest point. I need room to work the border from the back as well as the front. I thought of a fence, but while I wanted to block the view and add some privacy, I still wanted something casual but nice looking. I have nothing against fences--in fact, I think they are a great idea, just not necessarily for this spot. Plus I like the idea of breezes being able to flow through, especially in our hot and humid summers.
She offered ideas for shrubs to use and how to position them--a staggered planting of shrubs ("WW") along the rock wall with a narrow walkway between the back of the summer border and the inner row of shrubs.
Also, I was not sure how to tie the two sides of the grass oval together since one side has the summer perennial border and the other side, the all-season shrub border. She also offered some design ideas. It seems pretty simple--copy colors from the perennial border to the shrub border in a number of places. Of course, now I just have to implement it! I have allowed next year (2011) to complete the summer border and the following year (2012) to complete the complimenting shrub border, so I should have enough time to get it right! (Famous last words.)
I got some good ideas from a "gardening coach". Her name is Debbie Roberts and I found her through the Garden Designers' Roundtable web site. She lives in my area so she is very knowledgeable with the problems and good points of this spot and knowledgeable of gardening in general.The space between the back of the border is only about 12 feet from the property line at its closest point. I need room to work the border from the back as well as the front. I thought of a fence, but while I wanted to block the view and add some privacy, I still wanted something casual but nice looking. I have nothing against fences--in fact, I think they are a great idea, just not necessarily for this spot. Plus I like the idea of breezes being able to flow through, especially in our hot and humid summers.
She offered ideas for shrubs to use and how to position them--a staggered planting of shrubs ("WW") along the rock wall with a narrow walkway between the back of the summer border and the inner row of shrubs.
Also, I was not sure how to tie the two sides of the grass oval together since one side has the summer perennial border and the other side, the all-season shrub border. She also offered some design ideas. It seems pretty simple--copy colors from the perennial border to the shrub border in a number of places. Of course, now I just have to implement it! I have allowed next year (2011) to complete the summer border and the following year (2012) to complete the complimenting shrub border, so I should have enough time to get it right! (Famous last words.)
Still moving plants around
Everytime I think I will shut down for the season, the weather improves and I get another bout of energy.
I have a nice area by the kitchen porch where I seem to have planted to many plants. Originally, there was a Hygrangea macrophylla and a Korean Lilac (Syringa patula) which may, or may not, be 'Miss Kim'. The area needed a few more plants so I added some more. Perhaps it was due to all the rain in this area in the winter and the spring, but the lilac and especially the hydrangea, grew like "gangbusters" and overtook everything! The hydrangea grew to a mound 5 foot x 5 foot and 5 foot tall and was overcome with very large, blue flowers!
I am now in the process of trying to figure out what to do here. After tossing around a number of ideas, I decided to transplant two sections of the hydrangea to the new summer perennial border in the back row. I decided to let the rest of the hydrangea and the lilac have the area, except for the spring bulbs and the edging of aguga. In the spring. I will move the heath, spirea, mock-orange and bearded iris to the summer border.
Wednesday, October 20, 2010
Mulch your grass!
It is always nice to see that an idea of mine that I thought was a good idea, is actually be used by others and it is a good idea--mulch your grass in situ!
The article in this Fine Gardening eLetter has such an article. I have a Toro "mulching" lawn mover. I only rake a few leaves out from around some of my plants if they seem to be too packed. Leaves on my lawn simply get "mowed" with the grass and remain on the ground. They are mulched very fine. My soil can use all the improvements it can get and the grass seems to love its mulch amendment. If I seem to have too many leaves, I rake them into an area and then run the lawn mower over them. I then put that mulch on my gardens.
The article in this Fine Gardening eLetter has such an article. I have a Toro "mulching" lawn mover. I only rake a few leaves out from around some of my plants if they seem to be too packed. Leaves on my lawn simply get "mowed" with the grass and remain on the ground. They are mulched very fine. My soil can use all the improvements it can get and the grass seems to love its mulch amendment. If I seem to have too many leaves, I rake them into an area and then run the lawn mower over them. I then put that mulch on my gardens.
Tuesday, October 19, 2010
Don't tread on me!
One of the articles in the current Fine Gardening eLetter talks about"to rototill or not to rototill". It reminded me of when we decided to landscape this property and discovered that we had very little topsoil and mostly clay, and rocks from pebbles to boulders. We immediately bought a Troy-Built Horse size rototiller. We never regretted the purchase since without it, we would have no gardens and no lawn. In fact, this year when we decided to resusitate our property, Tillie went to work again. (I named the tiller Tillie the Toiler, and toil she did!)
I remember reading back then about not overtilling the soil -- just get it usable and then keep it in good shape. We bought tons of peat moss, topsoil, and lots and lots of earthworms! I think the earthworm purchase was another brilliant idea. (By the way, another reason not to repeatedly till the soil is that you may "chop up" your earthworms!) As we are turning over the soil (I use my favorite tool-- spading fork) this year, I see lots of big, fat earthworms -- it is a wonderful site.
I remember reading back then about not overtilling the soil -- just get it usable and then keep it in good shape. We bought tons of peat moss, topsoil, and lots and lots of earthworms! I think the earthworm purchase was another brilliant idea. (By the way, another reason not to repeatedly till the soil is that you may "chop up" your earthworms!) As we are turning over the soil (I use my favorite tool-- spading fork) this year, I see lots of big, fat earthworms -- it is a wonderful site.
One of the ways to keep the soil is good shape is not to walk on it! Now this is not for lawns and play areas, but for gardens. I remember learning a good way from the "Square Foot Gardener" Mel Bartholomew. I was into vegetable gardening at the time and he had a fantastic system for intensive gardening. (I used it and I had almost more produce than I could use.) He said never, never walk on your garden soil, and offered that you should put stepping stones in any garden that needed to be tended from within. The author of the current article says the same thing, showing that good ideas stay around forever--the previous generation teaching the current.
I enjoyed the eLetter article.
Monday, October 18, 2010
This and that
I managed to paint at least the section of the gazebo where we had to pull vines away and then sand. I put one coat of paint on the exposed areas. I was hoping to repaint the entire gazebo but it will have to wait for spring. I forgot that even painting is tiring work. At least, all the wood is protected.
We decided to cut down two "Dwarf" Alberta Spruce in front of the den windows. They grew too large and at one one end the Korean Lilac and the Inkberry (Ilex glabra [sp?]) really wanted to expand ... something had to give. We decided that if we took down one it made design sense to take down both. Actually, it looks very nice now. I might plant a rose bush. It will look nice against the house and since I only buy fragrant roses, the scent will be nice by the open window.
Our tree man came to discuss trees to take down/neaten. On the property line in back of my new summer border is the tallest, ugliest, poison ivied, decrepit Pine. It has been dropping its branches all over the place, so I decided to have it put out of its misery and save myself constant cleanup from it. We also found a few tall, skinny trees with "rugs" of leaves 35 foot up -- they also will come down. This should also let a little sunlight into a needed spot. I think we are finally making a good setting for the magnificent trees: oaks of all kinds, hickories, Stuartia, Black Cherries, American Elms (yes, I actually have some in perfect condition!), Tulip trees, a European Linden, an Ash, a Purple Beech, a Sourwood, and some nice looking Sassafras and Birch. Most of the trees were on the property when we bought it, or Nature planted after we moved in. We will try to keep a "managed woodlot".
If anyone living in this area of Connecticut, I have a great tree man: Robert Finch of Finch's Tree Service in Wilton.
I just read an emailed letter from Fine Gardening magazine. Two articles were of great interest. I will talk about them in the next post -- it is time to clean up and make dinner.
Sunday, October 17, 2010
Last barrows!
Finally, a gorgeous day and we dumped the last five wheelbarrows needed in the "to be" summer perennial border. This brings the total dumped by my hard-working wheelbarrow totting husband to 33! I am sure that in the spring, after the soil settles, there will be some fill-in needed. Fortunately, we have more than half of our 6 cubic yards left. I also have plans where to put some extra soil as I find more places to fix up!! I hope I don't have to buy any more soil. I think that having to move soil is more onerous than having to pay for soil!
Tomorrow, I really should paint the gazebo. Supposedly, we are back to rain on Tuesday.
This brings the total dumped by my hard-working wheelbarrow totting husband to 33! I am sure that in the spring, after the soil settles, there will be some fill-in needed. Fortunately, we have more than half of our 6 cubic yards left. I also have plans where to put some extra soil as I find more places to fix up!! I hope I don't have to buy any more soil. I think that having to move soil is more onerous than having to pay for soil!Tomorrow, I really should paint the gazebo. Supposedly, we are back to rain on Tuesday.
Thursday, October 14, 2010
Disappointing
I went to Home Depot today before going to the supermarket. It was a non-productive trip.
No large bales of peat moss, and worse, no red concrete slabs! Actually, I don't know why I am surprised. While the plant selection has been terrific, HD has been quite remiss through the years with getting red concrete slabs in stock. We have often had to go to the Fairfield HD to buy them in the past years. The other decorative blocks that we like and use for walkways and patios are 16 x 16 inch red slabs with brick pattern impressed in them. These too, we have had to go to Fairfield to get on many occasions. I don't understand this. Also, on some items, Fairfield is cheaper.
Well, it is a cool, grey day and the weatherman is talking about 1 - 2 inches of rain and much wind. I guess I will just relax inside and sulk.
Wednesday, October 13, 2010
Getting ready to be an armchair gardener
I think I will wind down planting/transplanting in my summer border. I am getting ready to just read and re-read my garden books, get others from the library, and make more lists of flowers and shrubs. I need to review my "Five-year Plan". I need to do some serious thinking about my landscape in relaxing comfort in front of the fire. I had hoped to do more this season, but as I look around, I am amazed at how much my husband and I accomplished. I get tired just thnking about it. Maybe it's alright to slow down. Besides, I have some other outdoor work to do such as re-paint the gazebo before the winter.
I have come up with some ideas (some with the help of friends) for the living room garden sections.
--Since I have started using 8x16 inch red contrete slabs as "mowing strips/edging", I will continue them as edging for the summer flower border and the summer shrub border. I may get the summer flower border edging down before the winter.
-At the back of the border, I will pound tall green wooden stakes into the ground at various intervals. These stakes will support four foot tall green vinyl garden fencing. This fencing will allow me to support vine plants such as clementis and roses in the rear row as part of the border. Gertrude Jekyll used posts and chains for this, but I like this better and this should blend into the background.
--Brick and slate steps going from the lawn =garden level to the slightly lower level behind the summer border. This may or may not, get done this year.
--The property boundary behind the summer border is not very wide, but I would like something to break the view into my neighbor's woodlot. I will leave about three feet clear behind the back of the border and then do a staggered planting of interesting shrubs.
Another day, another seven barrows
We are having another nice day but by tomorrow afternoon we are back to rain for a couple of days. I know we have oddball weather here, but this is getting surreal.
We moved another seven wheelbarrows of good topsoil to the summer border, added peat moss to the mix and turned it over. My husband thinks that we need at least another three sets of seven... hmmm.... We only move the soil when it is not raining and we have free time, so this could take a while. It certainly would be nice to have an entire week rain-free. Besides, the soil doesn't get a chance to really dry out. We are using a dapper orange steel True-Temper 6 cubic-foot wheelbarrow that we bought from Home Depot this spring for under $100. It has a solid tire. It seems very sturdy.
My Jackson 8 wheelbarrow, which I just love, has two tires and they constantly need air--what a pain! I think I will buy solid tires for it. We do have a trick for putting air in the tires which we had to develop because we could never get air in the tires without help from our garage mechanic. We inflate a flat tire with a partial can of "Fix-a-Flat". This works great and we can fix a tire immediately and keep working. We have done this a number of times. I suppose at some time, this may stop working. Talk about making things up as you go along!
I have to go to Home Depot to buy more peat moss--another item I could buy by the truckload. In the spring. I buy a lot of peat moss at once because I like to keep adding it to the soil.
We moved another seven wheelbarrows of good topsoil to the summer border, added peat moss to the mix and turned it over. My husband thinks that we need at least another three sets of seven... hmmm.... We only move the soil when it is not raining and we have free time, so this could take a while. It certainly would be nice to have an entire week rain-free. Besides, the soil doesn't get a chance to really dry out. We are using a dapper orange steel True-Temper 6 cubic-foot wheelbarrow
that we bought from Home Depot this spring for under $100. It has a solid tire. It seems very sturdy.
My Jackson 8 wheelbarrow,
which I just love, has two tires and they constantly need air--what a pain! I think I will buy solid tires for it. We do have a trick for putting air in the tires which we had to develop because we could never get air in the tires without help from our garage mechanic. We inflate a flat tire with a partial can of "Fix-a-Flat". This works great and we can fix a tire immediately and keep working. We have done this a number of times. I suppose at some time, this may stop working. Talk about making things up as you go along!
I have to go to Home Depot to buy more peat moss--another item I could buy by the truckload. In the spring. I buy a lot of peat moss at once because I like to keep adding it to the soil.
Tuesday, October 12, 2010
A little more planning & planting
We made a slight adjustment to the back edge of the perennial border--fortunately before we added the soil! This new edge will allow a nice transition of steps to go from the lawn level down to the back of the border, since the land slopes downward. I wasn't sure how to handle this, but I found a good idea as I was cruising the net. I will not do all the landscaping that is in this picture, just brick steps with flagstone treads and some low-growing plants on the side at the edge of the border. This is looking from the lower level up.  I finally decided that the border had a good-enough look to take a picture. I will try to take another one on a sunny day so that the border can be better seen. The rock wall at the right edge is the end of my property. My neighbor's woods are on the other side. Also on the right is the sloping area between the border and the lacecap hygrangeas. I am still deciding what to do to block some of the woodland so as to give a nice backdrop for the border. You can see a bit of the gazebo at the far end.
 Right now the back edging for the border is made from 2 x 10 inch planks. They are held in postion by wooden stakes. Ultimately, something nicer will replace the planks. The front edge is back to being 8 x 16 inch red concrete slabs from Home Depot. I am using them for edging the other planting sections in this living room garden area, and this will add continuity, I hope.
I finally decided that the border had a good-enough look to take a picture. I will try to take another one on a sunny day so that the border can be better seen. The rock wall at the right edge is the end of my property. My neighbor's woods are on the other side. Also on the right is the sloping area between the border and the lacecap hygrangeas. I am still deciding what to do to block some of the woodland so as to give a nice backdrop for the border. You can see a bit of the gazebo at the far end.Right now the back edging for the border is made from 2 x 10 inch planks. They are held in postion by wooden stakes. Ultimately, something nicer will replace the planks. The front edge is back to being 8 x 16 inch red concrete slabs from Home Depot. I am using them for edging the other planting sections in this living room garden area, and this will add continuity, I hope.
Monday, October 11, 2010
Oh, my aching body!
A nice sunny, mild day is not to be wasted ... hmmm ....
On Saturday, I finally bought screened topsoil, six cubic yards of it! Unfortunately, it couldn't be dumped very close to the perennial border. I am not sure how much soil I will need for the summer border but I know that on this property, no extra soil goes to waste. It is a good thing that we bought a new, strong wheelbarrow from Home Depot about a month ago. The barrow will certainly get a workout.
I am in charge of putting down peat moss and then turning over the soil at first. My husband is in charge of filling the wheelbarrow and dumping the soil. Then I smooth the soil and do a second light "turnover". I use a spading fork. Thank heavens the soil was, at one time, a prepared garden -- the going is still hard but I hate to think if we were starting from scratch!!
I found my notes from my old garden and found that the tall grass in question that I transplanted is Miscanthus sinensis 'Gracillimus' Maiden Grass -- a beautiful, strong growing plant. I can make quite a few divisions from it. It has been growing for about 20 years. It is growing into an area of Yucca filamentosa, or perhaps the Yucca is growing into the miscanthus. Anyway, I have to try to dig up some of those plants too. They also have been growing in that spot for about 20 years! Yuk!
  I finally took a picture of the unknown grass that I decided to let grow and see what happens next spring. Not the greatest picture but it really is quite attractive in real life.
On Saturday, I finally bought screened topsoil, six cubic yards of it! Unfortunately, it couldn't be dumped very close to the perennial border. I am not sure how much soil I will need for the summer border but I know that on this property, no extra soil goes to waste. It is a good thing that we bought a new, strong wheelbarrow from Home Depot about a month ago. The barrow will certainly get a workout.
I am in charge of putting down peat moss and then turning over the soil at first. My husband is in charge of filling the wheelbarrow and dumping the soil. Then I smooth the soil and do a second light "turnover". I use a spading fork. Thank heavens the soil was, at one time, a prepared garden -- the going is still hard but I hate to think if we were starting from scratch!!
I found my notes from my old garden and found that the tall grass in question that I transplanted is Miscanthus sinensis 'Gracillimus' Maiden Grass -- a beautiful, strong growing plant.
I can make quite a few divisions from it. It has been growing for about 20 years. It is growing into an area of Yucca filamentosa, or perhaps the Yucca is growing into the miscanthus. Anyway, I have to try to dig up some of those plants too. They also have been growing in that spot for about 20 years! Yuk! I finally took a picture of the unknown grass that I decided to let grow and see what happens next spring. Not the greatest picture but it really is quite attractive in real life.
Saturday, October 9, 2010
Higgledy, piggledy can be a garden principle
As I was, once again wondering where to put my latest "must have" plants in the garden that I was supposed to "plan before I plant", the term higgledy - piggledy came to mind. I know that I did say that I would create a layout of the garden following certain design principles, but I did also allow for a "stream-of-consciousness" approach now and then. I guess, I am getting quite a few "nows" as my garden plans itself! My grandmother put things in her garden where she liked them to be (she never took a course, nor read a gardening book as far as I know) -- and what a wonderful garden she had!
This reminds me of some letters to the editor in September/October issue of Fine Gardening magazine. They are in response to a letter to the editor in a previous issue (I don't have it) about "personal taste not that important" which they challenge. I agree.
The whole point about a garden is to bring enjoyment to the owner! Gardens are personal things, design principles can just be guidelines to follow as you wish, not to be held as a law immutable: a right way versus a wrong way. Remember Jim Crockett's statement that I consider applicable to many things (if not a "life" principle): Life is to short to stake asters, and modify it to: Life is too short to not have your garden as you you like it.
Thursday, October 7, 2010
Giving in to temptation
Today was "before we stop at the supermarket we stop at Home Depot to see if any exciting plants arrived", day.
Every week for about the last month, I stare at the Montauk Daisies-- they are so striking! I am always tempted but always pass them by. I was getting tired of being tempted but I tried to remain strong -- after all, I shouldn't buy any plant that I don't know where I am going to plant it. Besides, Montauk Daisies bloom from early to late fall, and I am planting a summer garden.
Montauk Daisy Nipponanthemum nipponicum, early to late fall bloom, white, 24 - 36 in. tall.
My husband broke the impasse by quoting Oscar Wilde: The only way to get rid of temptation is to yield to it... Now I just have to find a place for it. I also bought a Hosta plant -- only $5 for a good-looking plant -- now I have to find a place for it, too. Hosta hybrid 'Francee', mid to late summer bloom, lavender, 22-24in tall (with flower stalk, I presume)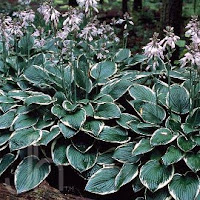
Tuesday, October 5, 2010
Amazon version of Gertrude Jekyll book
My husband just told me that Amazon is selling a number of Gertrude Jekyll's books. I was curious about the book that I have: Color Schemes for the Flower Garden. Yes, they have it but not the 1983 version that I have. Evidently, the current version is somewhat edited and it does not seem for the better.
The border plans are edited and the scale notations are removed! Also, her black and white photographs are missing. I think there was other editing, too.
The reviewers made some other comments. I want to add some of mine lest some of those comments keep you from buying this book. The reviewers did give the book great reviews.
-'This is not a "plug and play" book.' Very few gardening books are. You still must know your environment -- even what grows in your neighbor's yard may not grow in yours. This also applies to sites that offer a garden plan and all the plants for it. Also, it is true that you will want to have a plant reference book nearby for this (and many other) books.
-'Gertrude Jekyll had a trust fund, 10 acres, and many gardeners.' This is not a book for only similar people. It is meant to lead you to see what can be done whatever your resources, and if not in your current lifestyle, perhaps later on.
-'For the experienced gardener.' Yes and no. To understand all the nuances of how and why she is arranging her plants, you need to know about those plants, but you can get glimerings of ideas of how to start going about the process of creating a "painting" with your garden.
This book was still enjoyed by the reviewers. Buy this book but be on the lookout for the original, or at least, the 1983 version.
Sunday, October 3, 2010
A little more transplanting
I took advantage of another dry, sunny day (more rain coming for the rest of the week -- yuk) and transplanted another division of the tall grass whose name I finally discovered last night in some old notes -- miscanthus gracilius (sp?). I added it to the grass plot -- so now I have two miscanthus and one pennisetum. I hope they all survive. It could be a little late for transplanting.
I was inspired, so I transplanted a naturally growing tall Goldenrod to the border next to the Ligularia. I don't know if this is a perennial, biennial, or annual Goldenrod. If it is not perennial, maybe it will self-seed in that spot so that I will still have a Goldenrod there. We shall see ...
I gave yesterday's and today's plants a spray of water and Miracle-Gro on their leaves. The ground is still wet, and with this week's rain, the soil doesn't need any extra water
I was inspired, so I transplanted a naturally growing tall Goldenrod
to the border next to the Ligularia. I don't know if this is a perennial, biennial, or annual Goldenrod. If it is not perennial, maybe it will self-seed in that spot so that I will still have a Goldenrod there. We shall see ...I gave yesterday's and today's plants a spray of water and Miracle-Gro on their leaves. The ground is still wet, and with this week's rain, the soil doesn't need any extra water
Saturday, October 2, 2010
Much rain but got the new plants planted
My goodness, did it rain -- what is going on with this weather?
Anyway, today it is cool but at least we have sunshine. The ground is soggy but it could be turned over (spading fork) and soil amended with good topsoil and peat moss. At least I won't have to water the plants!
I planted the Solidago and Plumbago in the front row as edging plants. I may add another Solidago behind and to the side of the first. I am beginning to get into this "drifting" planting -- it's fun!
The Pennisetum grass went in the rear row at about the middle of the border. I know that I am getting "holes" in the border that will have to be filled at, but I couldn't resist buying the grass and that is where I wanted it to go. I also transplanted some grass from the other old perennial border that will become the new shrub border some day next to the pennisetum since the grass was alloted a four-foot stretch by 3 1/2 foot deep. I have to find my notes for the old garden because I can't remember if the grass is a pennisetum or a miscanthus -- but it is tall and good for the rear row.
I have to buy some screened topsoil before I can go much further with the border since at this time the back of the border is on land that slopes downward!
Wednesday, September 29, 2010
Shopping for Perennials
My Home Depot is on the way to the grocery store; therefore I have instituted the rule of always stopping first at Home Depot to see if any new plants have come in. (Once the planting season is over, I will skip the Home Depot stop-- at least for plants.) As usual, some new plants arrived -- so I just had to by some. I did pick plants that I knew exactly where they would go. It's too late in the season for me to try to set up new areas. I also, made note of plants that I will consider next spring. I am still amazed at the selection of plants, shrubs, etc -- and the nice prices!
I bought one annual -- I couldn't resist a gorgeous pink garden mum.
I also bought some bags of top soil to fill in here and there in an emergency.
.
I bought one annual -- I couldn't resist a gorgeous pink garden mum.

I bought three perennials:
Pennisetum "Foxtrot" , a 4 - 5 foot tall grass Solidago "Sweety" , a 14 inch tall Goldenrod, blooms late summer to fall.
.jpg) Ceratostigma plumbaginoides (Plumbago, Leadwort) -- gentian blue flowers on a 12 inch tall plant, blooms late summer to fall.
Ceratostigma plumbaginoides (Plumbago, Leadwort) -- gentian blue flowers on a 12 inch tall plant, blooms late summer to fall. .jpg)
I also bought some bags of top soil to fill in here and there in an emergency.
.
Sunday, September 26, 2010
More Fall Planting of Perennials
I decided to transplant some white Siberian irises  from an old garden to the new garden. I do a lot of digging with my spading fork
  besides using it to turn the soil over. I couldn't garden without it. In fact, I have two!
In hard to dig soil the spading fork will go into the ground easier. It is also good at lifting plants from the soil.
I have a lot of work to do in the garden before the winter, but while I didn't do very much today, I did something! Now I can reward myself by just reading about gardening!
I should have done more -- oh well.
 from an old garden to the new garden. I do a lot of digging with my spading fork
  besides using it to turn the soil over. I couldn't garden without it. In fact, I have two!
In hard to dig soil the spading fork will go into the ground easier. It is also good at lifting plants from the soil.
I have a lot of work to do in the garden before the winter, but while I didn't do very much today, I did something! Now I can reward myself by just reading about gardening!
I should have done more -- oh well.
Thursday, September 16, 2010
Fall Planting of the Summer Border
I decided to reward myself for turning over 10 linear feet of soil by doing some planting. This end of the garden has a Ligularia Stenocarpus  left from the original border. Also the summer an interesting mound of grass grew in front of it. I left it alone -- I hope it is a perennial grass!
Anyway, at the end of the border in the rear row I planted a white shrub hibiscus (next to the hibiscus is the Ligularia). Those two take up 10 feet.
In the middle row, I planted Amsonia tabernaemontana . This is another plant that remains from the previous garden. It is a strong- growing plant and spreads nicely. Thus I could divide the best plant (which was now growing in the wrong spot) into 3 large pieces; one of which I planted here. Next to this plant is the "interesting" grass.
In the front row, I transplanted some blue Siberian irises from another area of the property. I "drifted" them into the grass plant area (a la Gertrude Jekyll). I then transplanted some yellow perennial foxglove
  (Digitalis lutea, I think) into and amongst the area. Next to the Siberian iris, I transplanted some Stachys lanata (Lamb's Ears)
  .
.
I am trying to be frugal and creative by using plants that I already have, and interesting native plants that I find on my property. Of course, the native plants may or may not be perennial--spring will be interesting!
As I am planning my garden on graph paper, I am trying to incorporate Gertrude's "drift" approach with other of her ideas. Also, while I will have a blueprint, I will allow myself to re-design my garden "as I go" in the field, a sort of stream of consciousness approach, thus freeing me and my garden to explore -- should be interesting!
 left from the original border. Also the summer an interesting mound of grass grew in front of it. I left it alone -- I hope it is a perennial grass!
Anyway, at the end of the border in the rear row I planted a white shrub hibiscus
 (next to the hibiscus is the Ligularia). Those two take up 10 feet.
In the middle row, I planted Amsonia tabernaemontana
 . This is another plant that remains from the previous garden. It is a strong- growing plant and spreads nicely. Thus I could divide the best plant (which was now growing in the wrong spot) into 3 large pieces; one of which I planted here. Next to this plant is the "interesting" grass.
In the front row, I transplanted some blue Siberian irises
 from another area of the property. I "drifted" them into the grass plant area (a la Gertrude Jekyll). I then transplanted some yellow perennial foxglove
  (Digitalis lutea, I think) into and amongst the area. Next to the Siberian iris, I transplanted some Stachys lanata (Lamb's Ears)
  .
.I am trying to be frugal and creative by using plants that I already have, and interesting native plants that I find on my property. Of course, the native plants may or may not be perennial--spring will be interesting!
As I am planning my garden on graph paper, I am trying to incorporate Gertrude's "drift" approach with other of her ideas. Also, while I will have a blueprint, I will allow myself to re-design my garden "as I go" in the field, a sort of stream of consciousness approach, thus freeing me and my garden to explore -- should be interesting!
Wednesday, September 15, 2010
Preparing the Summer Border Soil
Fortunately, my new border is within most of the area of a previous larger border that I had planted and then let go to rack and ruin (long story) years ago.
When I originally planted this area, I wanted to follow Jim Crockett's advice about doubling digging the soil. After my husband and I tested digging, we did wonder how this was going to work out. We decided to buy a "horse" model rear-tilled rototiller from Troy-Built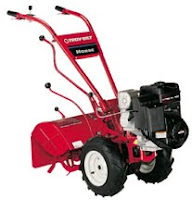 . I promptly named it "Tillie the toiler" -- and toil it did. It was the greatest purchase we made for this property with "soil" of clay and of rocks from pebbles to boulders.
The boulders had to be dug out manually and we let the rototiller dig into the soil to its ability of 6 inches. Once the top soil was loosened, we then started the double digging. We hoped to follow Jim's advice and go down to 24 inches. Needless to say, we found this depth too much for our endurance! Sometimes we could go down about 18 inches, but sometimes not much more than 12.
We dug out the subsoil and replaced it with the top soil plus peat moss, lime, and fertilizer (1 shovel soil, 1 shovel of dry peat moss, 1 shovel of sharp sand--when we had it). We then amended the subsoil--same way-- and placed it on top. Let me tell you that double digging gets very tiring very quickly and that this was the only area that we did it. Sorry Jim, we really did try ...
Now, my new border is smaller but still has to be dug over with shovel and spading fork
  (I couldn't garden without a spading fork -- able to get into all kinds of soil!). I add lots of peat moss. I do not double dig! There are still a lot of rocks to remove -- I think they come up from China. It does help that the old garden was "double dug".
I will have to buy topsoil because this new area slopes downward at the rear and I want the entire garden to be at the same level.
I have dug over about a 10 foot length out of about 60 feet. I am starting at the gazebo end because the other end is still in a "planning stage". I am planning to work on the soil as much into the winter as I can and then begin again in the spring in time for planting.
When I originally planted this area, I wanted to follow Jim Crockett's advice about doubling digging the soil. After my husband and I tested digging, we did wonder how this was going to work out. We decided to buy a "horse" model rear-tilled rototiller from Troy-Built
 . I promptly named it "Tillie the toiler" -- and toil it did. It was the greatest purchase we made for this property with "soil" of clay and of rocks from pebbles to boulders.
The boulders had to be dug out manually and we let the rototiller dig into the soil to its ability of 6 inches. Once the top soil was loosened, we then started the double digging. We hoped to follow Jim's advice and go down to 24 inches. Needless to say, we found this depth too much for our endurance! Sometimes we could go down about 18 inches, but sometimes not much more than 12.
We dug out the subsoil and replaced it with the top soil plus peat moss, lime, and fertilizer (1 shovel soil, 1 shovel of dry peat moss, 1 shovel of sharp sand--when we had it). We then amended the subsoil--same way-- and placed it on top. Let me tell you that double digging gets very tiring very quickly and that this was the only area that we did it. Sorry Jim, we really did try ...
Now, my new border is smaller but still has to be dug over with shovel
 and spading fork
  (I couldn't garden without a spading fork -- able to get into all kinds of soil!). I add lots of peat moss. I do not double dig! There are still a lot of rocks to remove -- I think they come up from China. It does help that the old garden was "double dug".
I will have to buy topsoil because this new area slopes downward at the rear and I want the entire garden to be at the same level.
I have dug over about a 10 foot length out of about 60 feet. I am starting at the gazebo end because the other end is still in a "planning stage". I am planning to work on the soil as much into the winter as I can and then begin again in the spring in time for planting.
Tuesday, September 14, 2010
The Summer Perennial Border
 This border will be on the right of a large oval grassy area going from my living room French doors to my gazebo near the back of the property. The oval was orginally bounded by two perennial borders, but this time around the left side will be a shrub border.
 I started by staking out the border. Once I was happy with the outline and size, I drew the border outline on ledger size graph paper, at 4 squares to the inch and each square represents a foot.
From my research, I made lists of all the perennials that I want to plant, including substitutes in case I can’t get my first choice. I also made a list of annuals to use as filler wherever there is a temporary bare spot--although many annuals are worth the effort to replant every year in a permanent spot. I also included in my perennial list any perennials recommended as companion plants and combinations I saw in pictures. In my research I found that many perennial borders incorporate shrubs and herbs. I like this idea.
Now I am really having fun. I am looking through all my books and notes and trying to decide which plants I want where in the border. I love a lot of plants so I am struggling to keep the list of different plants under control. I would like to just have a dozen or so and then repeat them throughout the garden with different companion plants—different in color or in the same color but different plant shape. Also, some plants will be for “accent” and some for massing.
I have flexible guidelines for the placement of the plants. The first row will be 2 foot deep and contain plants between 1 ½ to 2 ft tall; the second row will be 2 ½ foot deep and contain plants 2 to 3 foot tall; the third row will be 3 ½ foot deep and contain plants more than 3 foot tall. Depending on the individual planting, spacing may change.
The length allotted to a specific plant in a specific row is variable. The first row will have plants mostly in long variable streams, with some accent plants, maybe. The second row will have massed plants or accent plants, so that the length will be anywhere from 2 ½ to 3 ½ feet. The back row plants are allotted 3 to 4 feet. Some plants will be planted in “drifts” as Gertrude Jekyll did in her gardens. A drift goes at an angle across rows so that the viewer sees the plant along the walk rather than just at one spot. I will be trying a lot of Gertrude Jekyll’s ideas. (I really recommend her book, if you can find it.)
I like the following two layouts as starting points. The top shows Gertrude Jekyll's "drifts" and the bottom scheme allows plants to merge into the neighboring plants. Both schemes let plants "be on the move".
 One thing that I was never happy about in my previous border was how to get enough plants and in the right places to have a bloom season from spring to fall and have the border look full and interesting. I decided to take Gertrude Jekyll’s advice–"don’t do it". She suggests making a complete garden for each season (even if the garden has to be small). She had a spring garden, a June garden, a summer garden, and a fall garden. Also consider making gardens of just one color: whites, blues, yellows, greys, etc. There is a lot of variation in any given color family to make a very nice display.
Since I want my garden to be viewed in all its glory in summer, I shall plants perennials that bloom then, and if some bloom across seasons, all the better. My garden will contain some plants grown for foliage only. These are good as companions as well as being always in “bloom”. I hope to find a few shrubs for the back row that are either evergreen or have some winter interest.
Well, enough for today.
Monday, September 13, 2010
Beginning at the Beginning, Part 3
Non-Back-Braking Fun Part of Project, continued
************* Finally, The Grand Design!**************
I have identified and drawn the areas to be landscaped on graph paper. There will also be a large grassy areas. Grass will be planted last because it is bound to get messed up as I tear up the rest of the place. Next I made up my Five-Year Plan. There are just too many things to be done, and in some places, I keep changing my mind. Now the landscaping is broken up into managable work pieces--and finances needed. Also, a five year plan lets me make some changes as I go along.
The areas "under construction" are in the back and on the side of the house. I will have a large perennial border, a large shrub border, maybe a small vegetable and herb garden, a small glade at the rear of my property, and on the side a managed woodlot and plants up the slope to the outcrop. The front of my property is already landscaped and just needs some cleanup.
From my research, I have made lists of all the perennials, shrubs, and trees that I want to plant, including substitutes in case I can’t get my first choice. I also made a list of annuals to use as filler wherever there is a temporary bare spot--although many annuals are worth the effort to replant every year in a permanent spot. In my research I found that many perennial borders incorporate shrubs and herbs. I like this idea.
Now things are really getting exciting! I have picked the first area the I want to do--the long perennial border.
Saturday, September 11, 2010
Beginning at the Beginning, Part 2
Non-Back-Braking Fun Part of Project, continued
-Walking through My Property
I keep walking around the property. I am trying to imagine what could be put where. I am making lots of notes and I am constantly getting new ideas, a lot of which I throw away, retrieve, and back and forth. After I have worn myself out, I give up. This is a great part of the project because I get a lot of exercise and fresh air. This step gets interleaved between my most favorite part of the project: research!
-Research: reading, cruising the internet, visiting local nurseries, and taking courses
This is really a very relaxing part of gardening! I do this constantly--when I'm designing the garden, when I need to relax, when I need inspiration. This part of gadening doesn't care what the weather is, how many rocks are in the planting hole, how tired I am, how disgusted I am, and on and on. The result of this step reminds me that I can "persevere and ... excel" (a motto of one of my alma maters ) in my garden. And reading, interneting, and taking courses can be done sitting down, which is great for my tired body.!
I buy a lot of gardening books and I also take out library books. I have subscribed to a number of magazines in the past, but the only one I have subscribed to for this venture is Fine Gardening. I hope I still like it. I am planning a visit to a bookshop and the library to review other gardening magazines to see if there are any others I want to get. I do a lot of reading, in fact as soon as I finish this section, and make dinner, I am going to spend the evening reading and dreaming over a couple of my favorite books.
There is an almost endless amount of gardening info on the internet. Sites can be strictly be informational (discussions and databases) or nursery websites. Nurseries tell me what plants are available with pictures, and many have an incredible amount of related info including companion plants (with pictures) to make the most eyecatching display. I spend a lot of time on the internet and I keep finding more and more valuable sites.
Another way to get information is to take courses. I took many courses at the New York Botanical Gardens in the Bronx. The courses were very good, and I could ask questions of a "live" person, could use their library, and I could view incredible gardens.
As soon as I get my notes organized, I will start writing a Page on all the good books, magazines, and web sites I have found.
I just love this research stuff! It restoreth the soul!
continuing in Part 3 ... The Grand Design comes to life!
Saturday, August 28, 2010
Beginning at the Beginning, Part 1
I suppose one could just go out and buy some appealing plants and then come home and find a place for them, and I have done that. This sometimes works out and sometimes doesn't. A better way, and a lot of non-back-braking fun, is to make up a plan. In my case, I am creating a Five-Year Plan since my landscape is in disarray, and this way I can get some things accomplished while still "planning" other areas. I have broken my two-acre property into three major design areas each with a number of sub-areas since my property besides being in disarray, is oddly laid out. There is a lot of work to do; fortunately, I intent to live to be 100.
Non-Back-Braking Fun Part of Project
******Know your Property******
-Need Accurate Size and Shape of Property:
I was fortunate to have my surveyor's plot plan so that I didn't have to create a measured drawing of my property (including house and driveway placement). I made a couple of copies of the appropriate area of the plot plan for me to use. I then added all the existing trees, shrubs,etc. I made a ledger size of the property to be landscaped and letter size of the main areas. These two sizes allow me to do detail or bird's eye work needed.

-Need Planting Zone Info:
Map is easily found in gardening books and magazines = Zone 6. This tells the theoretically accurate lowest and highest temperture expected in the zone. Any year's temperature may differ, and it is also good to know which month has the highest temperature days and which the lowest. Also, I needed to find out the first and last expected frost date. The actual date can be different (and has been) in any given year.
-Whither the sun, rain, and wind
I made charts of the sun and shade areas of my property on a two-hour basis throughout the growing season. My property had too many trees where I wanted to grow "sun" plants. so we have been taking trees down. In a couple of spots, I wanted some shade so we actually had to plant a few trees.
I also tied orange flagging on trees to watch the wind patterns.
Also, I researched rainfall patterns, except lately, the weather's been weird (temperature patterns also). I guess I'll try to expect the unexpected and be prepared.
-Find Planting Microclimates:
Properties tend to have spots where you may be able to grow plants that you didn't think you could. Sometimes you can actually make a microclimate to grow a plant you just can't live without. For instance, there are a couple of plants that I love that need more of a moist environment than I normally have. With a "cistern" and a specific watering plan, I can give a spot at lot more water than rain gives it. I also grow plants that need more warmth by planting close to the house against a south-facing wall.
-Test the Soil
Try digging holes. It is interesting to see how well the shovel goes (or doesn't go)into the soil and to find out how many rocks there are, and how sandy or clayey the soil is. Some of my property is sandy (a small amount), most if it is clay, and all of it is rocky. I also have some very large rocks just where I want to plant. My husband is very handy with a pick axe and we have gone through a number of them! Sometimes I just find another spot.
to be continued in Part 2 ...
Subscribe to:
Posts (Atom)